ArrayBuilder Application

Purpose

The Arraybuilder application is used to design an ArrayBlock. 

Using the Application

Using ArrayBuilder is pretty straight forward.  It can be used alone or in conjuction with the Specimens Application, as we will see later.

Viewing an ArrayBlock

The user begins opens an ArrayBlock by going to the menu, selecting File, and then Open. 
The user is presented with a list of ArrayBlocks.  Pick whichever ArrayBlock you wish to view or design.
An administrator sets which ArrayBlocks a user can access.

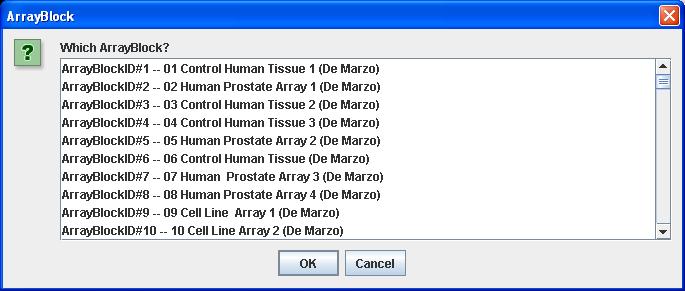
A List of ArrayBlocks from which the user can pick.


Below we see the ArrayBuilder application opened. 


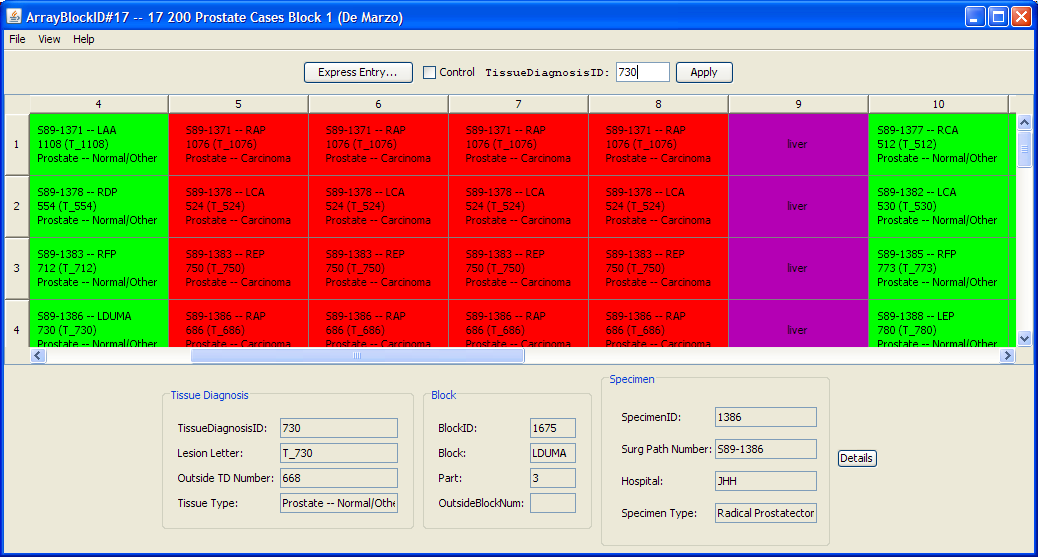
The main screen of the ArrayBuilder application.


Entering Data

  1. Select a coordinate.  The currently selected coordinate will appear in yellow.
  2. Choose a value to enter (see below for details on different options)
    1. Enter a known Tissue DiagnosisID
    2. Click the Control checkBox, and type in a description of the control tissue, e.g. kidney.
    3. Click the Express Entry Button
  3. Click the Apply Button

Option#1: Entering a Known TissueDiagnosisID

You may use a TissueDiagnosisIDs that was generated in the Tissue Diagnosis Tab of the Specimens Application

Option#2: Using Control Tissue

Why use Control Tissue?
Control Tissue
is used in Tissue MicroArrays for quality control.  For example, in the above array, prostate cancer is being studied. 
However we see a column where control tissue from other parts of the body is put in (Column#9).  In this column we see tissue from the brain, kidney,  and liver.
Generally controls are put in set locations in the Array.  For example, some places put controls in Columns 1,5,and 20.
When the array is scanned, the control tissues look noticable different, even to an untrained eye. 
This gives one confidence that they are looking at the Array in the proper direction, and that it wasn't scanned upside down at a 90 degree anglel.
Having controls makes it easy to know what part of the Array one is viewing when the Array is viewed under a microscope. 
Control Tissue is optional, but most Tissue MicroArray constructors make use of it.

To use a control tissue, check the control checkbox, and type in a description of the control tissue. Control Tissues get a default tissueDiagnosisID.  When you use a control, you do not specify the original specimen from where the tissue was cut.  Therefore you will not see a SurgPathNumber for controls.  Again, all controls get the same (default) TissueDiagnosisID.

Option#3: Express Entry

Click the Express Entry button to view the Express Entry Dialog, shown below.

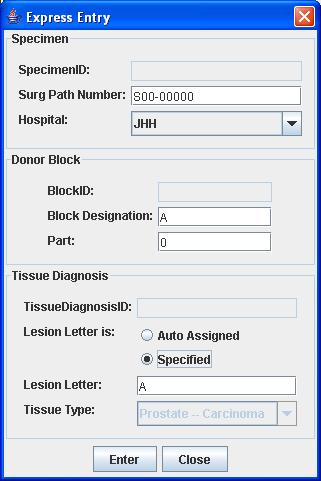
The Express Entry Dialog

Using the Express Entry dialog allows one to bypass use of the Specimens Application.  The Express Entry dialog will generate a Tissue DiagnosisID given minimal information about the Specimen, Block, and TissueDiagnosis.  You must know the follow information:
Specimen: SurgPathNumber -and- Hospital
Block: BlockDesignation -and- Part
TissueDiagnosis: The TissueType (e.g. Prostate--Carcinoma) -and- optionally the Lesion Letter. 

Tissue Diagnosis: Auto Assigned  and Specified
You have 2 options when entering TissueDiagnosis information in the Express Entry Dialog.  You may either have the lesion Letter auto-assigned or specified.
It is preferred you specify the lesion letter.  The block should have one or more areas circled and each circled area should be given a letter and a diagnosis.  By convention the first letter assigned is A, then B, and so on.  The letter should be written on the block itself.

However some institutions don't use the concept of lesion letters and only have one TissueDiagnosis per block.  If this is the case, you may choose to have your lesion letter auto-assigned.  Use this option only if you do not care about the lesion letter.

Here are details of what is happening behind the scenes during auto assignment of lesion letters: When the tissue diagnosis is auto-assigned, every tissue-diagnosis with the same tissue type will get the same lesion letter.  If you change the type, you will get a different lesion letter.  But the bottom line is all TissueDiagnosis's on the same block with the same TissueTypes will get the same lesion letter (and same TissueDiagnosisID).  The following table shows this concept:

Auto Assigning a Lesion Letter
Entered Values:
Surg Path Number: S00-00000
Hospital: JHH
Block Designation: A
Part: 0
Tissue Type: Prostate

Assigned Values:
TissueDiagnosisID:999 
LesionLetter=V-1
Entered Values:
Surg Path Number: S00-00000
Hospital: JHH
Block Designation: A
Part: 0
Tissue Type: Prostate

Assigned Values
TissueDiagnosisID:999 
LesionLetter=V-1
Entered Values:
Surg Path Number: S00-00000
Hospital: JHH
Block Designation: A
Part: 0
Tissue Type: Bladder

Assigned Values
TissueDiagnosisID:1000
LesionLetter=V-2
Entered Values:
Surg Path Number: S00-00000
Hospital: JHH
Block Designation: A
Part: 0
Tissue Type: Bladder

Assigned Values
TissueDiagnosisID:1000
LesionLetter=V-2


ArrayCore Data Panel

At the bottom of the screen in the ArrayCore Data Panel.  It displays the data of the whichever ArrayCore the user has selected. (The currently selected ArrayCore appears in yellow.)  Each ArrayCore refers to one TissueDiagnosisID.  This panel shows information about the TissueDiagnosis, the Block, and the Specimen. 

To view the details of any ArrayCore in the Specimens application:
1) Highlight any coordinate
2) Click the details button. 
The specimens application will open and the details of the Specimen, Block and TissueDiagnosis of the ArrayCore will be shown.


Color Scheme

Go to the menu, choose view, and then "Color Scheme -- De Marzo Lab".  Each of the ArrayCores will be color-coded by the TissueType of its assigned TissueDiagnosis.


<< Back to the Manual

© Copyright 2009 | All Rights Reserved | The Johns Hopkins University