Importing Array-Images


The main purpose of the import application is to import array-images into TMAJ after they have been scanned by an array-slide Scanning machine. 


Array Slide Scanning Machines


The purpose of the array-slide scanning machine is to scan a physical array-slide and convert every spot on the array-slide into an image file (such as a jpeg, gif, tiff, or png).  
For the machine to be compatible with TMAJ, it must be able to do 2 things:
  1. Produce an invididual image for every spot on the ArraySlide.  So a 20 x 20 array should have 400 images.  It would *not* be okay just to give TMAJ one huge image with 400 spots on it.
  2. Produce a way to link a coordinate (such as x = 5, y = 3) to each of the image files.  There are several ways this can be done. 
    1. One way is to simply put the coordinates in the filename, like such:
      01_01_spot.jpg  (x=1 y=1)
      01_02_spot.jpg  (x=1 y=2)
      01_03_spot.jpg  (x=1 y=3)
      01_04_spot.jpg  (x=1 y=4)
      ...
      20_18_spot.jpg  (x=20 y=18)
      20_19_spot.jpg  (x=20 y=19)
      20_20_spot.jpg  (x=20 y=20)


    2. Another way is to have an XML file that contains a mapping of the filenames to coordinates.  The ARIOL does this.
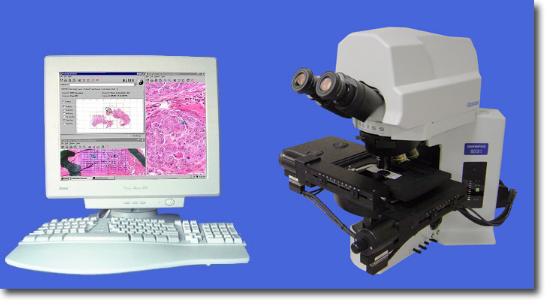
The BLISS machine scans an ArraySlide.  Notice the ArraySlide in the microscope.


If you have a compatable array-slide scanning machine, all these things are already addressed and you have to do nothing.  If you do not have a compatable array-slide scanning machine, you have to have a way of numbering your image files with coordinates, or simply write a short script to do it.  There are a number ArraySlide Scanning machines on the market.  Below is a list of compatable array-slide scanning machines.

Compatable Array-Slide Scanning Machines

These machines are known (and have been tested) to be compatable with TMAJ:


How To Import ArrayImages


  1. Scan the array-slide with a scanning machine or a microscope.  The output of the machine will produce images for each coordinate as an image file (such as jpeg).
  2. If necessary, name the images files according to their coodinates.  Note: You can skip this step if you are using a recognized scanning machine such as the Bliss, Acis, Aperio, or Aperio.  If you don't have a recognized scanning machine, you will have to name each image file manually (or write a short script.)
  3. Log on to TMAJ.  Go to the Import application by clicking the import button.  Click on the Array-Images Tab.

  4. Click the Select Scan button.  A dialog comes up.
    1.  You should be on the ArrayBlocks tab.  If the array-block exists, highlight it.  If the array-block does not exist, click the Add button.  Then put in information for the array-block, and then click the save-button.  After highlighting the array-block, click the ArraySlides >>> button.  Then will take you to the Array-Slides tab
    2. On the ArraySlides tab, pick an array-slide or create a new one.  Make sure to enter the cut number and stain.  After you have highlighted an array-slide row, click the Scans >>> button.  this will take you to the Scans tab.
    3. On the Scans Tab, pick a scan or use the add button to create a new one if it does not exist.  Do not forget to press the save button.  Make sure to choose the proper scanning machine.
    4. Click the Okay Button at the bottom after you have selected a scan.  You can simply select a scan and skip the array-block and array-slide tab if the scan already exists.

    The Select Scan Dialog.  Users select a scan and then click the okay button.


  5. Click the Browse Button to select the directory where the scanning machine put your images. 
  6. Optional: The Compression Button will control how much your images are compressed in the application.  You can skip this steps if the defaults are acceptable to you. 
  7. If you are using the Ariol Machine, you must click the Ariol Renamer button to have your images renamed with their coordinates. (If for some reason you ever want to un-rename your images, you can click the Ariol Renamer button by holding the shift key.)
  8. Click the Upload Button.  This step will compress your images and upload them to the server.  A copy of the original images is also uploaded.   This step will take at a while, and can be cancelled with the cancel button.  You willbe prompted to choose a project if the array-slide is not already in a project.  After the upload has completed, you will see the directory you uploaded in the Server Images Directory drop-down box.
  9. The final step is to click the Link Images to Scan Button.  Before this is done, it is assumed you have selected a scan, as well as chosen the proper "Server Images Directory" in the drop-down box.  Unless you've done these steps out of order, this should already be done. 


The ArrayImages Import Screen


Verify the Images can be Viewed
  1. Close the import application, go to the main login window and click the reset button.  This refreshes the cache in case you've added any new scans during the import process.
  2. Go to the Images Application by clicking the images button. 
  3. Locate the project for the array-slide.  You should have been prompted to put the array-slide in a project in the import application.  However, if the array-slide is not in a project, you can use the administrator application to assign an array-slide to a project.
  4. Locate the array-slide, which will be under the proper project.
  5. Locate the scan, which will be under an array-slide.
  6. After the scan is highlighted, then click the new button. A dialog pops up.  Click the okay button to create an image-scoring session. (If you choose the Image Analysis Session radio button, you can start an image-analysis session.).  A new session appears below the scan
  7. Double click on the session to open it.
  8. Verify that you can see the images that you uploaded.  If you can, the process is a success.  If you can't, you might have forgotten something such as pressing the Link Images to Scan button.


Naming Format for Image Files

If you are using a recognized scanning machine, the filenames will already be in the proper format.    TMAJ will automatically know which format to use because you specify the scanning-machine when you name the directory (shown above). 

Manually Naming your Files

If you don't have a scanning machine that TMAJ recognizes, you will need to name the files yourself.  (You might want to write a short script to name them programatically.)
Here is how you manually name your files:
You must go through every image file in the directory and name them in this format:
 y_{y-coordinate}_x_{x-coordinate}_{any-extra-information-you-want}.jpg    (the extention does not have to be jpg -- it may be jpeg, tif, tiff or gif)

You should make all your coordinates 2 characters long (i.e. "05" instead of just "5") because the operating system for sort the files in alphabetical order.

Examples for an array with a width of 5 and a height of 20:
y_01_x_01_spot.jpg
y_01_x_02_spot.jpg
y_01_x_03_spot.jpg
y_01_x_04_spot.jpg
y_01_x_05_spot.jpg
y_02_x_01_spot.jpg
y_02_x_02_spot.jpg
y_02_x_03_spot.jpg
y_02_x_04_spot.jpg
y_02_x_05_spot.jpg
y_03_x_01_spot.jpg
y_03_x_02_spot.jpg
y_03_x_03_spot.jpg
y_03_x_04_spot.jpg
.
.
.
y_20_x_03_spot.jpg
y_20_x_04_spot.jpg
y_20_x_05_spot.jpg


Lastly, make sure you select STANDARD as your scanning-machine when you add the Scan record.

More Notes on Filenames

Each scanning machine has a different format.  If you are using the ACIS, the pre-import tab will take care of this.  This is just for notes are how files are imported.  The files must be named in a specific format so that TMAJ can pull out the X and Y coordinates  The scanning machine should output files with filenames based upon their coordinate.  For example, spot (x=5,y=11) would be output as:  0_0_5_11_0_0_0.jpg   (Only the 3rd and 4th position are significant).    It should noted that different scanning machines use different outputs.
For example, the BLISS machine may use something like:
    0_0_5_11_0_0_0.jpg
whereas the ACIS machine may use:
    07261614_1_31_2008_A y_11 x_5.jpg
The import program will know which machine has been used to scan the images since the machine name is contained when the user selects a scan.  Inside TMAJ, there is code for parsing the X and Y coordinates for each of the scanning machines.

File Naming on the ARIOL Machine

On most scanning machines, the jpeg filenames already have the x and y coordinates in them.  However this is not the case with the ARIOL machine.  The ARIOL machine's output is:
Make sure to follow the instruction above where the Ariol Renamer button is clicked to rename the images and put file coordinates in the filenames. 
On other scanning machines this step is skipped.