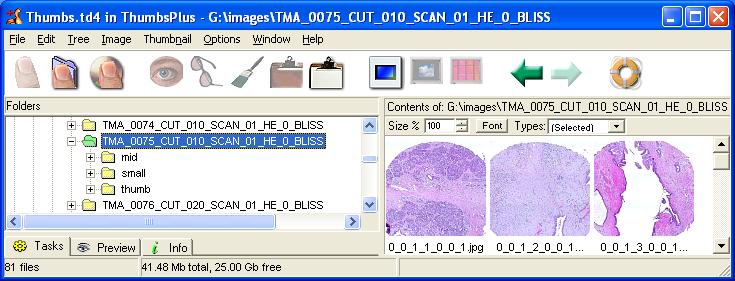
Under the directory, 3 subdirectories are created: mid, small and thumb. Each of these have their own, compressed images.
|
| A directory representing a scan
has been selected. To run a batch process on the directory, go to
the menu, choose "image", then choose "Batch Process". Under the directory, 3 subdirectories are created: mid, small and thumb. Each of these have their own, compressed images. |
| Size Description |
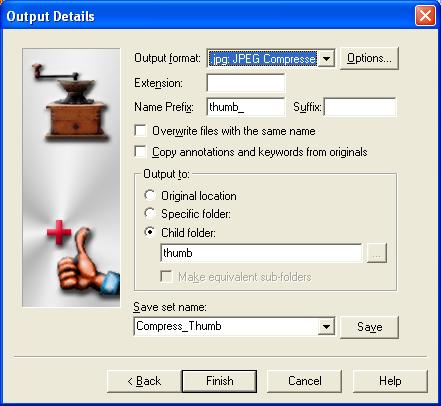
Child Directory |
Size |
Prefix |
JPEG Quailty |
| small |
small/ |
600 |
small_ |
original (check "Use
Original Quality" checkbox) |
| mid |
mid/ |
320 |
mid_ |
50 |
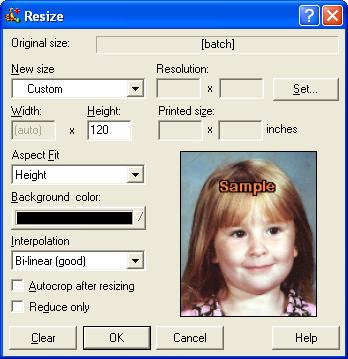
| thumb |
thumb/ |
120 |
thumb_ |
50 |
|
|