|
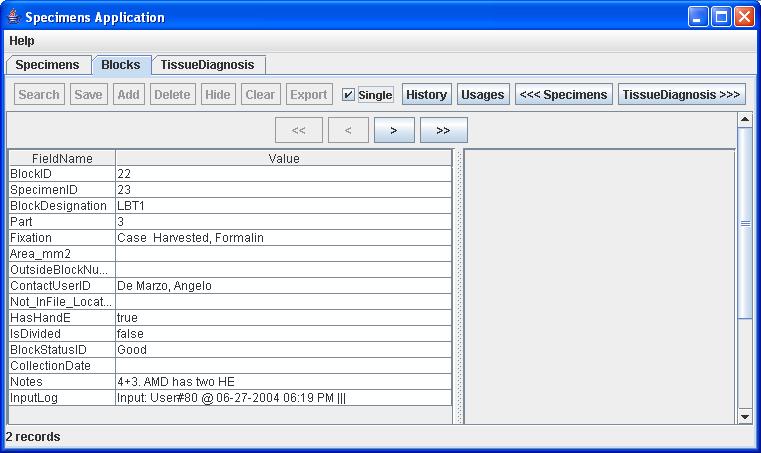
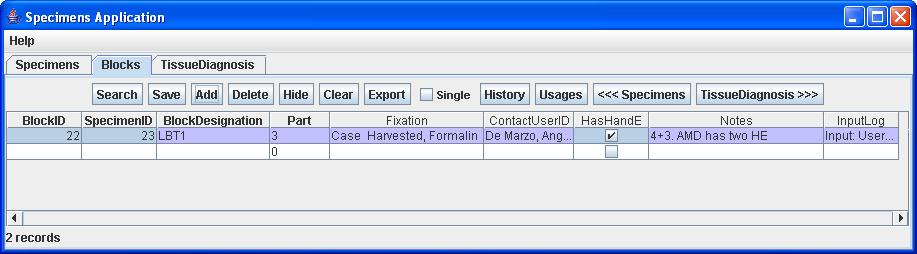
| The table where blocks are input
into TMAJ. |
| Search |
Displays the Search Dialog |
| Save |
Saves changes to the database.
No changes are made until the save button is pressed. |
| Add |
Adds a new row |
| Delete |
Indicate the row is to be
deleted. (The row is not actually deleted until the Save button is
clicked.) |
| Hide |
Brings up the Hide Columns
Dialog where you can choose which columns you want hidden or
displayed. |
| Clear |
Clears the table, such that
there are no rows. |
| Export |
Exports the data shown in the
table to a tab-delimited text file. |
| Single |
Changes the table to Single
Entry Mode |
| History |
Shows who has modified a row,
and when. See History Dialog |
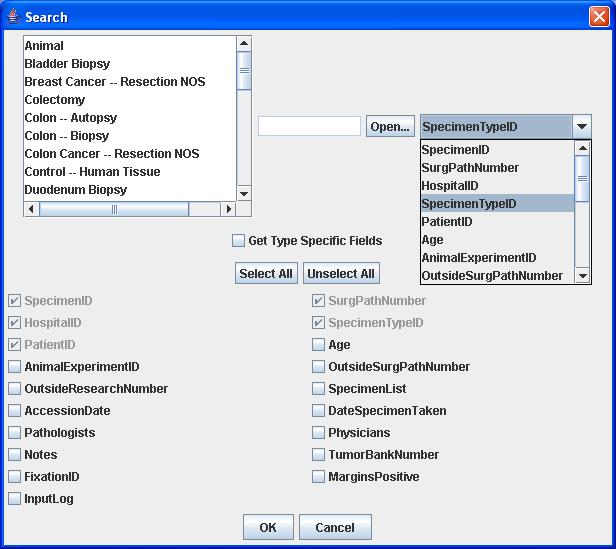
| To Search: Step 1: Select a field to search. For example, SurgPathNumber. If you select a field that is enumerated (meaning it has choices), the choices will appear in the list on the very left. If the field is not enumerated (meaning you just type a value in) the list on the left will be disabled, and you can enter the value in the textfield in the middle. Step 2: Select a value to search. For example, S55-12345. Or if the field is enumerated, select what values you want to return in the list. Note: If you want to return every value in the table, leave everything blank. Also note if you are not an administrator: the program will only return what rows to which you have access. Step 3: Choose the columns you want to get. If the column is greyed out, it means it is a required column, meaning that the column won't accept an empty value should you choose to add another row. To get all columns in the table, hit the Select All button. To get only the required columns for the table, click Unselect All. Step 4: Click the OK button. Note: The Get Type Specific Fields is only shown for dynamic tables. If this checkBox is selected, this search will return columns that are specific for certain types. If this checkbox is left unchecked, only common fields will be returned (that is, fields that are common to all types.) |
|
Clicking the Single Checkbox
places the table in Single Entry Mode.
This displays one row vertically. Thus, you see one row on the
entire
screen. This is useful if
the table has a lot of columns and they are hard to see on just one
screen. Unselecting the checkbox returns the table to
multiple-entry
(normal) mode.
|
|
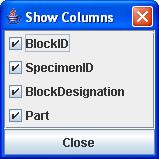
| Sometimes it is easier to view the tables with only some of the columns visible. Click the Hide button, and select which columns you want to view. |
|
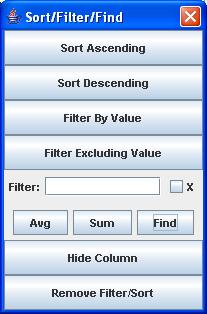
The Sort/Filter/Find dialog can
be displayed by right clicking on any cell in the table.
|
|
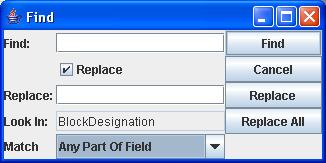
| The find dialog can be used to
find values in a table, and optionally replace them. The "Look In" field refers to the column that is being searched. |
|

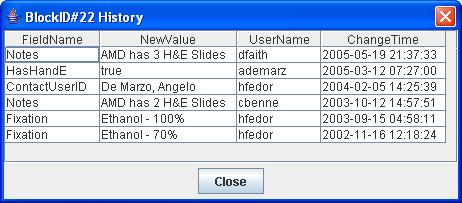 |
| The History Dialog.
The History Dialog can be
displayed by highlighting a row and then clicking the History
button. It shows the history of changes to the row, namely what
field was changed, the new value, the date of change, and who changed
it. |
© Copyright 2009 | All Rights Reserved | The Johns Hopkins University